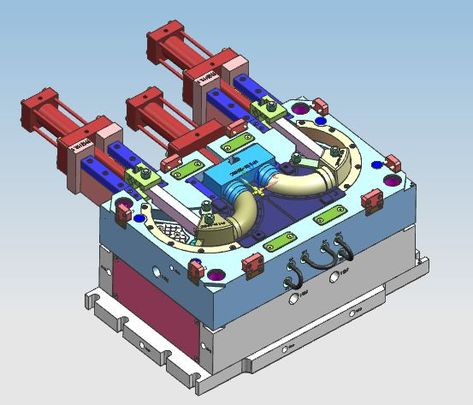
Designing plastic injection molds demands precision, technical expertise, and a methodical approach. This guide breaks down the seven critical steps to create efficient, durable molds while addressing common challenges and industry best practices. Whether you’re a novice or refining your skills, these insights will streamline your design process and improve outcomes.
1. What Are Plastic Injection Molds?
Plastic injection molds are tools used to shape molten plastic into specific parts. But here’s the kicker: their design directly impacts product quality, cycle time, and production costs. Key components include cavities (which form the part), cores (creating hollow sections), and ejector pins (removing finished parts).
Two-plate molds are standard for simple geometries, while three-plate molds handle complex parts with multiple gates. Automotive and medical industries rely heavily on these molds for high-volume production. What’s the real story? A poorly designed mold can lead to defects like warping or sink marks, costing thousands in rework.
| Common Mold Types | Applications |
|---|---|
| Two-plate molds | Consumer goods, packaging |
| Three-plate molds | Electronics, automotive components |
| Hot runner molds | High-volume production (e.g., bottle caps) |
2. How Do You Start the Design Process?
Begin by defining project requirements. Ready for the good part? Collaborate with clients to clarify part geometry, material (e.g., ABS vs. polypropylene), and production volume. Use concept sketches or 3D software like SolidWorks to visualize the mold.
For instance, a medical device manufacturer needed a mold for syringe components. By prioritizing tight tolerances and FDA-approved materials, the team reduced defects by 22%. This is where it gets interesting: early collaboration with engineers ensures alignment on cooling channels and ejection mechanisms.
3. What Are the Critical Design Steps?
Step 1: Analyze part geometry and calculate draft angles (1–3° minimum). Step 2: Optimize gate placement to minimize flow resistance. Step 3: Design cooling channels to reduce cycle time by 15–30%.
A case study from a toy manufacturer shows how adjusting gate locations eliminated air traps. But wait—there’s more: mold flow simulations (e.g., Moldflow) predict issues like weld lines before cutting steel.
| Design Step | Key Consideration |
|---|---|
| Part analysis | Wall thickness uniformity |
| Gate placement | Avoid stress concentration |
| Cooling layout | Balanced temperature zones |
4. Which Materials Work Best for Injection Molds?
Tool steel (e.g., P20) offers durability for 500k+ cycles, while aluminum suits prototypes. Here’s the twist: heat-treated steels like H13 withstand abrasive plastics like glass-filled nylon.
A automotive client saved 18% by switching to aluminum for low-volume trim parts. Pro tip: balance material costs with expected production volume to avoid overspending.
5. How to Avoid Common Design Mistakes?
Overlooking shrinkage rates is a classic error. For example, ABS shrinks 0.5–0.7%, requiring oversized cavities. Don’t miss this: use venting channels (0.02–0.04mm depth) to prevent air traps.
A case study highlights a electronics firm that reduced scrap rates by 40% after optimizing wall thickness.
Conclusion
Mastering plastic injection mold design hinges on meticulous planning, material expertise, and leveraging simulations. By following these seven steps, you’ll reduce errors, cut costs, and accelerate production. Ready to take action? Audit your current designs using the strategies above and download our free mold checklist [here].
FAQ Section
Q1: What is plastic injection mold design?
Designing molds to shape molten plastic into precise parts, ensuring repeatability and quality.
Q2: How long does the design process take?
Simple molds take 2–4 weeks; complex designs require 8+ weeks due to simulations and revisions.
Q3: Which factors influence material selection?
Production volume, part complexity, and budget. Steel for longevity, aluminum for prototypes.
Q4: How do you prevent defects in final products?
Run mold flow analyses and adjust cooling rates or gate positions early in the design phase.
Q5: What impacts mold design costs the most?
Material grade, tolerance requirements, and complexity. Simplify geometries to cut costs.


